
General Information
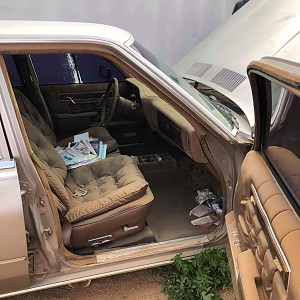
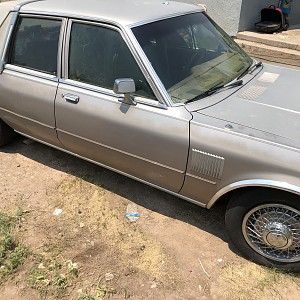
1988 Chrysler Fifth Avenue - 2 owner car, with me being the second, however it is still in the family.
My Grandfather bought this car brand new in 1988... This car was a fixture of my childhood, and I was honored to get it after my grandfather passed away in 1998. I got the car, in 2005 - and as a teen tried to make it look 'cool' - when in reality I did not much to it.. Now, that I am 31, I am going back to this car and looking to treat her to a restoration to beauty, and a memory of someone who I loved dearly.
Updates will be based on the day of working on the car itself, rather than how many days since starting this project. Time is limited at times so there may be a good amount of time between updates, or small minor parts being done one day.
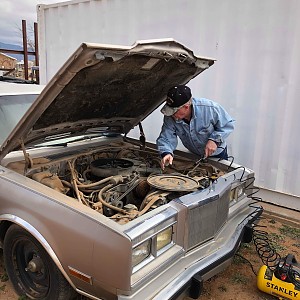
Day 1-3 - New Fuel Filter, Battery, Air Filter, and Distributor Cap
Day 1 - After sitting for ten years, it was time to get her running again. First thing, was to put fuel and an additive in her. Using an anti-varnish booster, (Used the entire bottle - overdosing was not harmful as per the bottle) and 4 gallons of fresh fuel mixed with roughly 2-4 gallons of old gas, and a jump, she started. Would not run for longer than a few seconds, however it is better than nothing.
Day 2 - Replaced the battery, fuel filter and air filter. Started quicker but still would not run.
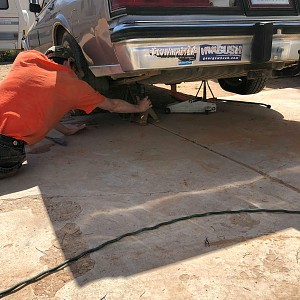
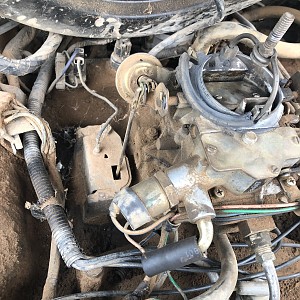
Day 3 - Found the distributor cap was heavily corroded. Replaced, and it ran a little longer but not enough to do anything. Disconnected fuel filter (already dark red fuel in it) and cranked a little, getting really dark and gritty fuel coming out of the tank. Decision made to drop the tank and clean it out. Planning ahead for a possible carb rebuild, etc. VIDEO UP SOON!


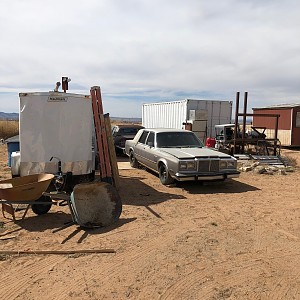
Day 4 -
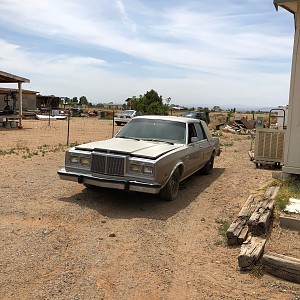
Cleaned out behind the '91 Imperial in background, and moved The Pearl onto concrete slab. Next task is drop the fuel tank and clean out gunk and varnish left behind. During the small tow-and-push across the yard, the engine was cranked to turn the power steering pump enough for the steering to work better and less stress on the system. It ran for about 4 minutes without the intention of even starting it. Not bad for this small amount of effort so far. VIDEO UP SOON!
On a side note, all but one of these tires holds air perfectly. The forth only loses a little over time. Tread is perfect, although I know they wont last very long once shes moving again.

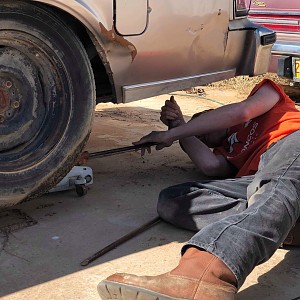
Day 5-8 -
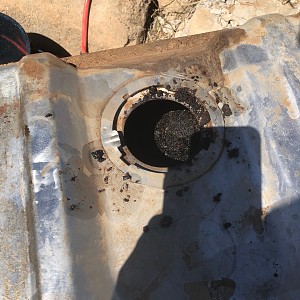
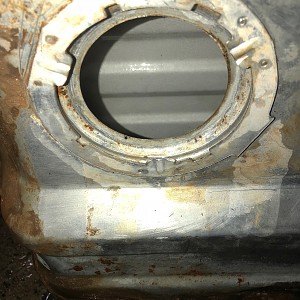
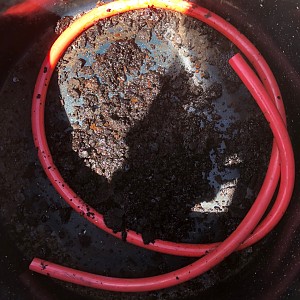
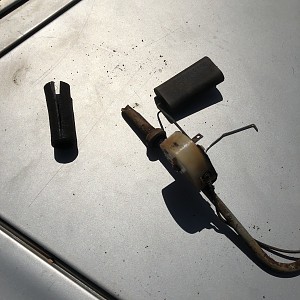
Dropped the gas tank over the course of a couple of days. This revealed about a half inch or more of black goo and sludge. Fuel sending unit send tube was also full of this disgusting goo, and upon inspection the in tank fuel filter crumbled. Cleaned our the sending unit and ordered a new sock/filter.


Let 1 gallon of Mean Green Super Degreaser, diluted with 1 gallon of water sit in the tank for about 48 hours. No evident leaks from anything, and thankfully little to no rust anywhere on or in the tank.
Took tank to a car wash, and pressure washed out the gunk and Mean Green mixture - and was pleasantly surprised.
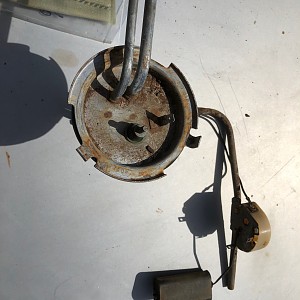
Took the tank home and let it sit overnight. Next morning there were traces of rust on the inside, so I figured I needed to get the tank hooked up and gas in it. So, the little bit of stuff left in the tank was dry, and easily shop vac'd out. Installed the fuel sending unit and new sock, (had to scrub the sending unit, fuel level float, and all parts of the unit as well) and reattached the tank.


After installing the tank, it ran - almost perfectly. I was extremely excited and went about putting the wheels back on and getting it off the jack-stands. Got everything lined up for a short 1/2 mile test run, and it made it to the side of the yard and would not move further.

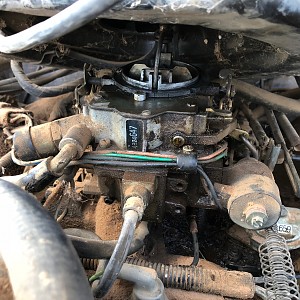
In the process of figuring out why it would no longer run, I discovered a leak from the carburetor and very low trans fluid. So off to troubleshoot some more.
More videos soon!!
Update - (No more counting days - hard to keep track at this point)
Leak amazingly fixed itself after I replaced the PCV valve... yes - the PCV valve... gaskets must have been dry and the bad PCV valve wouldn’t let the car run.
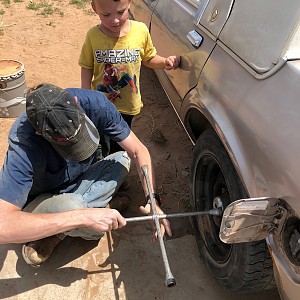
Drove the car home and puttered around for a few days.. massive vibrations from 30 mph to 45... replaces the ten year old tires, and so that is now gone.
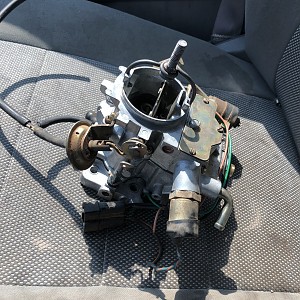
Car was hesitating and bogging down while driving... Hills? HA - nope. After looking and tinkering, found out the carburetor was flooding - so off to rebuild.

Now that it is finished , this is how it looks now..

So far - pre-test drive, it appears to be running better, no flooding and all around more responsive.
Came across some hubcaps on this website forum - added those today as well - 8-1-2018.

There is a slight hole in the top front of my gas tank unfortunately- however some JB Weld will fix that without much issue.
Gas gauge is a little off... well, a lot. Ran out of gas twice before the carburetor rebuild.. both times gauge said quarter to half tank. Lovely- I’ll have to drop the tank...
Again.
Update -
After having gas in the tank for about 2 months, and driving it - the gas gauge is now in tip top shape on its own.
Here is a video regarding moving The Pearl before dropping the tank etc. I am working on videos revolving around the tank and etc.
My Grandfather bought this car brand new in 1988... This car was a fixture of my childhood, and I was honored to get it after my grandfather passed away in 1998. I got the car, in 2005 - and as a teen tried to make it look 'cool' - when in reality I did not much to it.. Now, that I am 31, I am going back to this car and looking to treat her to a restoration to beauty, and a memory of someone who I loved dearly.
Updates will be based on the day of working on the car itself, rather than how many days since starting this project. Time is limited at times so there may be a good amount of time between updates, or small minor parts being done one day.
Day 1-3 - New Fuel Filter, Battery, Air Filter, and Distributor Cap
Day 1 - After sitting for ten years, it was time to get her running again. First thing, was to put fuel and an additive in her. Using an anti-varnish booster, (Used the entire bottle - overdosing was not harmful as per the bottle) and 4 gallons of fresh fuel mixed with roughly 2-4 gallons of old gas, and a jump, she started. Would not run for longer than a few seconds, however it is better than nothing.
Day 2 - Replaced the battery, fuel filter and air filter. Started quicker but still would not run.
Day 3 - Found the distributor cap was heavily corroded. Replaced, and it ran a little longer but not enough to do anything. Disconnected fuel filter (already dark red fuel in it) and cranked a little, getting really dark and gritty fuel coming out of the tank. Decision made to drop the tank and clean it out. Planning ahead for a possible carb rebuild, etc. VIDEO UP SOON!
Day 4 -
Cleaned out behind the '91 Imperial in background, and moved The Pearl onto concrete slab. Next task is drop the fuel tank and clean out gunk and varnish left behind. During the small tow-and-push across the yard, the engine was cranked to turn the power steering pump enough for the steering to work better and less stress on the system. It ran for about 4 minutes without the intention of even starting it. Not bad for this small amount of effort so far. VIDEO UP SOON!
On a side note, all but one of these tires holds air perfectly. The forth only loses a little over time. Tread is perfect, although I know they wont last very long once shes moving again.
Day 5-8 -
Dropped the gas tank over the course of a couple of days. This revealed about a half inch or more of black goo and sludge. Fuel sending unit send tube was also full of this disgusting goo, and upon inspection the in tank fuel filter crumbled. Cleaned our the sending unit and ordered a new sock/filter.
Let 1 gallon of Mean Green Super Degreaser, diluted with 1 gallon of water sit in the tank for about 48 hours. No evident leaks from anything, and thankfully little to no rust anywhere on or in the tank.
Took tank to a car wash, and pressure washed out the gunk and Mean Green mixture - and was pleasantly surprised.
Took the tank home and let it sit overnight. Next morning there were traces of rust on the inside, so I figured I needed to get the tank hooked up and gas in it. So, the little bit of stuff left in the tank was dry, and easily shop vac'd out. Installed the fuel sending unit and new sock, (had to scrub the sending unit, fuel level float, and all parts of the unit as well) and reattached the tank.
After installing the tank, it ran - almost perfectly. I was extremely excited and went about putting the wheels back on and getting it off the jack-stands. Got everything lined up for a short 1/2 mile test run, and it made it to the side of the yard and would not move further.
In the process of figuring out why it would no longer run, I discovered a leak from the carburetor and very low trans fluid. So off to troubleshoot some more.
More videos soon!!
Update - (No more counting days - hard to keep track at this point)
Leak amazingly fixed itself after I replaced the PCV valve... yes - the PCV valve... gaskets must have been dry and the bad PCV valve wouldn’t let the car run.
Drove the car home and puttered around for a few days.. massive vibrations from 30 mph to 45... replaces the ten year old tires, and so that is now gone.
Car was hesitating and bogging down while driving... Hills? HA - nope. After looking and tinkering, found out the carburetor was flooding - so off to rebuild.
Now that it is finished , this is how it looks now..
So far - pre-test drive, it appears to be running better, no flooding and all around more responsive.
Came across some hubcaps on this website forum - added those today as well - 8-1-2018.
There is a slight hole in the top front of my gas tank unfortunately- however some JB Weld will fix that without much issue.
Gas gauge is a little off... well, a lot. Ran out of gas twice before the carburetor rebuild.. both times gauge said quarter to half tank. Lovely- I’ll have to drop the tank...
Again.
Update -
After having gas in the tank for about 2 months, and driving it - the gas gauge is now in tip top shape on its own.
Here is a video regarding moving The Pearl before dropping the tank etc. I am working on videos revolving around the tank and etc.