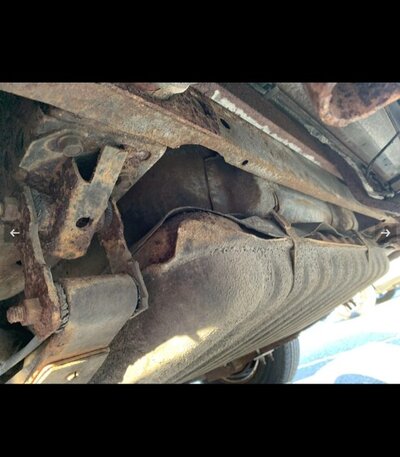
Looking for any info on '76 Aspen wagon fuel tank

Heavy Armor

Member
Joined
Feb 19, 2023
Messages
9
Reaction score
0
Location
USA
I've got a rusty '76 Aspen wagon that is completely missing the spare tire recession and the fuel tank... apparently they completely disintegrated. I think, based on a few pics I've found, I can have the spare area reconstructed. However, I am finding literally ZERO info on a fuel tank. All I know is that the wagon uses a different tank than everything else. I can't find any pics or dimensions for the wagon version. Any extra info would be greatly appreciated.
 

AMC Diplomat

Well-Known Member
Joined
Feb 14, 2023
Messages
1,640
Reaction score
773
Location
NY
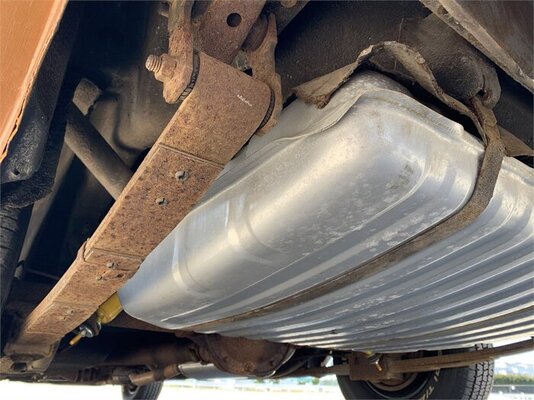
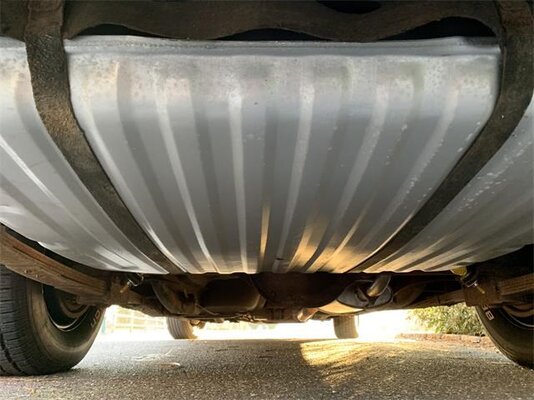
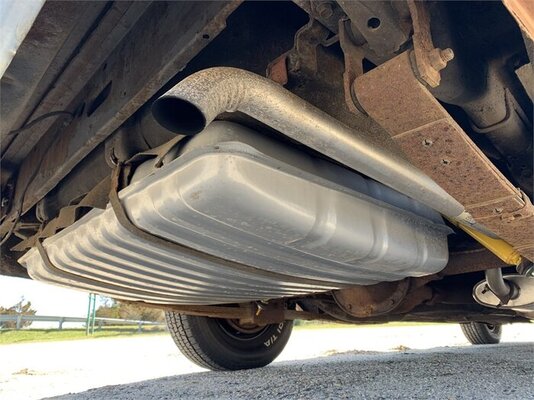
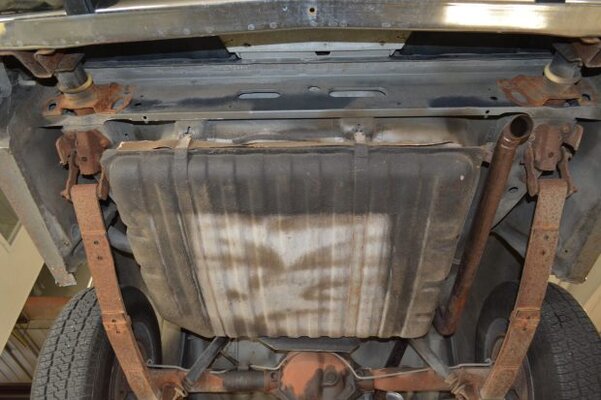
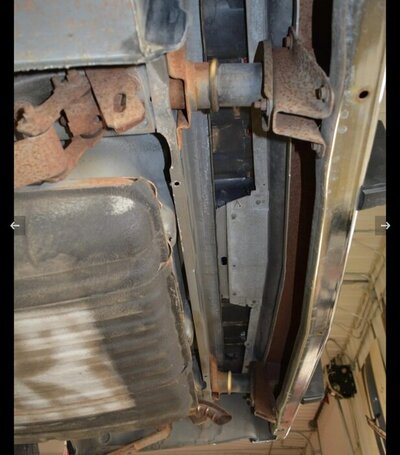
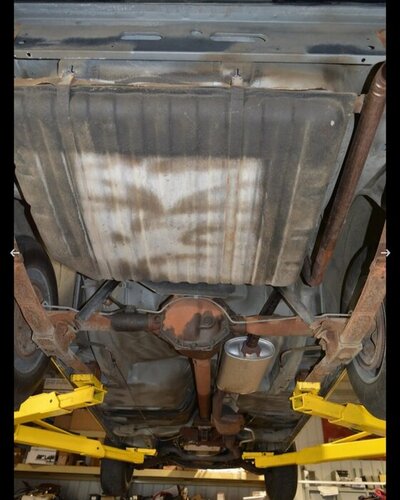
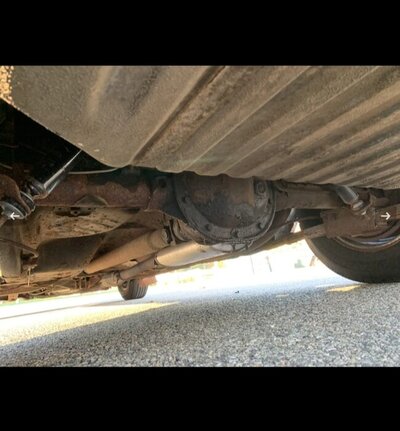
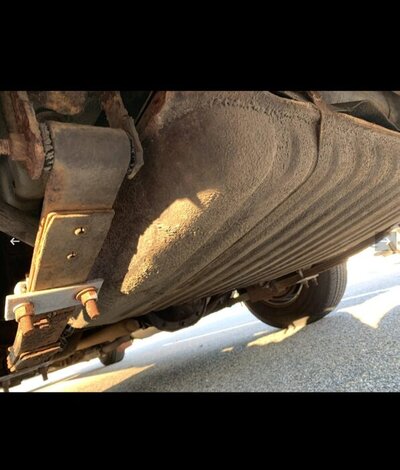
I'm pretty ignorant but it looks like the tanks are the same to me. The these are pics of a tank in an Aspen wagon d85b9924-2b2e-43b0-9c0b-89bff8542e96_largesize.jpge57e5a76-5206-4353-916d-6d8b0866ee23_largesize.jpg8587ec8d-c45c-473e-a87c-4be6e9ecd5ff_largesize.jpg
And these are pics of a tank in a dodge diplomat 4 door
DSC_0038-8-scaled.jpg
Screenshot_20230220-113925_Chrome.jpgScreenshot_20230220-113922_Chrome.jpg
And another aspen wagon
Screenshot_20230220-112652_Chrome.jpgScreenshot_20230220-112640_Chrome.jpgScreenshot_20230220-112628_Chrome.jpg

8587ec8d-c45c-473e-a87c-4be6e9ecd5ff_largesize.jpg
 

Mikes5thAve

Well-Known Member
Joined
Mar 3, 2020
Messages
1,768
Reaction score
729
Location
Canada
There's a fairly recent post that talks about about the older tanks vs newer and the changes.
Frankly since youre dealing with the floor too I would go with whatever tank/fuel pick up combination is most readily available and use that.
 

Heavy Armor

Member
Joined
Feb 19, 2023
Messages
9
Reaction score
0
Location
USA

Heavy Armor

Member
Joined
Feb 19, 2023
Messages
9
Reaction score
0
Location
USA
Supposedly the '76 has a "hump" tank, and the '77 onward doesn't (at least for the Volare, I assume it's the same for the Aspen). I haven't been able to determine what a "hump" tank is. All the pics I've found of new tanks look the same.
 

Aspen500

Well-Known Member
Joined
Feb 14, 2015
Messages
7,345
Reaction score
2,991
Location
Rib Mountain, WI
Yes '76 and early '77 have a big hump on the left side, along with different floor pan.Unfortunately those tanks are made from unobtainium (no repops). The late '78 to early '79 are different and then '79 built from April 2, 1979 and later are slightly different again.

Coupe, sedan and wagon use the same tank

Since your pan sounds to be rotted away, essiest thing is change it to the newer style and use the non hump tank. Both early and post 04.02.79 tanks are available brand new, along with the straps and sending unit as well.
 
Last edited:

Heavy Armor

Member
Joined
Feb 19, 2023
Messages
9
Reaction score
0
Location
USA
Yes '76 and early '77 have a big hump on the left side, along with different floor pan.Unfortunately those tanks are made from unobtainium (no repops). The late '78 to early '79 are different and then '79 built from April 2, 1979 and later are slightly different again.

Coupe, sedan and wagon use the same tank

Since your pan sounds to be rotted away, essiest thing is change it to the newer style and use the non hump tank. Both early and post 04.02.79 tanks are available brand new, along with the straps and sending unit as well.
Oh, OK, so since I don't even have a pan, it's not a big deal? I was just going to have a simple "box" welded back in, just deep enough to hold a spare. Sounds like anything available would work with that.
 

volare 1977

Well-Known Member
Joined
Jun 12, 2014
Messages
1,927
Reaction score
303
Location
maryland
If your changing the trunk floor then get the available 78 tank. I think it would be easier to get a good used trunk floor and weld it in.
 

Aspen500

Well-Known Member
Joined
Feb 14, 2015
Messages
7,345
Reaction score
2,991
Location
Rib Mountain, WI
Here's what the various tanks look like.

1976-early 1977 (unsure of change over to non-hump date).

tank hump.jpg


Late 1977 through 04.01.79 :

tank before april 2.jpe


April 2, 1979 and up:

tank post april.jpg


Difference between the 2 later tanks is pre April '79 has a vent tube on the front of the tank, and the rollover vent valve is under the car, near the r.f. footwell next to the inner rocker. After April 2, the rollover vent valve goes in a grommet on top of the tank, which requires a hump in the center of the trunk floor for clearance.
 

Aspen500

Well-Known Member
Joined
Feb 14, 2015
Messages
7,345
Reaction score
2,991
Location
Rib Mountain, WI
When making the floor, keep in mind it's so the tank is in stock position so the fill tube goes into the grommet straight. I mean depth of the floor pan plus the reenforcing ribs above the tank that the straps attach to.
 

Heavy Armor

Member
Joined
Feb 19, 2023
Messages
9
Reaction score
0
Location
USA
Put the project down for awhile, now I'm coming back to it. I figured out part of the problem. This being a '76 wagon and designed around the "hump" tank, I've discovered one of the reasons nothing else is fitting right. I didn't realize the hump faced upwards when it installed... see the illustration attached. My tank strap brackets are not symmetrical like every pic posted above. The driver side strap bracket is mounted directly to the underside of the floor, while the passenger side strap is mounted like the ones above. I'm thinking the dimensions may be different as well. This '78 tank is almost scraping side-to-side, and is deeper front to back that the actual strap brackets. I think this is why no one else has bothered to just drop another tank in it... no direct replacement.

Screenshot 2025-06-27 175814.jpg
 

AMC Diplomat

Well-Known Member
Joined
Feb 14, 2023
Messages
1,640
Reaction score
773
Location
NY
Your original post said the floor was rotted out, so just make your own mounting points. I've done that on rotted out Town Cars and Crown Vics.

And how is it scraping side to side? The widths of these cars didn't change
 

Heavy Armor

Member
Joined
Feb 19, 2023
Messages
9
Reaction score
0
Location
USA
And how is it scraping side to side? The widths of these cars didn't change
My exhaust was rubbing the side, but upon further inspection, it's because it's not connected in the front and the weight is causing it to twist in the rear bracket. So that part is not an issue. However, the 77-78 tank definitely seems deeper front to back. I have some pics I'm about to post up with explanations.
 

Heavy Armor

Member
Joined
Feb 19, 2023
Messages
9
Reaction score
0
Location
USA
Here are some pics of my rustbucket with some insights into what I'm seeing, and the reason I think the '77-'78 tanks maybe aren't the best option (unless you're good with a grinder and a welder ;)).

EXHIBIT A: Passenger side mounting points for a 1976 Aspen wagon. 1977 tank shown (no top valve hole).
passenger-side-location.jpg


This tank is lifted up to the point that it's making physical contact with mounts. The mounting points (yellow) are inside and directly above the tank itself (red edges), which makes it seemingly impossible to get a strap around and actually reach the bolt. The original strap I have doesn't come anywhere close to reaching around this.


EXHIBIT B: Driver side mounting points.
driver-side-locations.jpg

This is a composite image I made, so perspective and distance is a bit weird. These mounts (yellow) are directly against the floor of the car, not on the bottom of the spare tire box like the other side and like the pics posted earlier. The tank is pressing against the passenger side mounts and cannot be lifted any higher. I could possibly build a spacer to provide pressure against the tank, and the extra distance would provide access to the bolt despite the depth of the tank.


EXHIBIT C: filler hole distance
filler-pipe.jpg

The strap mount is highlighted in yellow just for reference. The red is the location of the filler hole. There's a significant misalignment. I think I would have to cut off the filler pipe before the bend and run a rubber tank hose in it's place. I'm actually not sure what's supposed to bridge the gap here, since the tank didn't come with any other parts and clearly there's nothing existing on my end to seal the system.


Anyway, just wanted to add these for anyone else that is digging around on the internet and looking for solutions.

EDIT: Oh here's one more shot of the overall spare box for the '76 wagon.

spare-box.jpg
 
Last edited:

AMC Diplomat

Well-Known Member
Joined
Feb 14, 2023
Messages
1,640
Reaction score
773
Location
NY
Here are some pics of my rustbucket with some insights into what I'm seeing, and the reason I think the '77-'78 tanks maybe aren't the best option (unless you're good with a grinder and a welder ;)).

EXHIBIT A: Passenger side mounting points for a 1976 Aspen wagon. 1977 tank shown (no top valve hole).
View attachment 56166

This tank is lifted up to the point that it's making physical contact with mounts. The mounting points (yellow) are inside and directly above the tank itself (red edges), which makes it seemingly impossible to get a strap around and actually reach the bolt. The original strap I have doesn't come anywhere close to reaching around this.


EXHIBIT B: Driver side mounting points.
View attachment 56167
This is a composite image I made, so perspective and distance is a bit weird. These mounts (yellow) are directly against the floor of the car, not on the bottom of the spare tire box like the other side and like the pics posted earlier. The tank is pressing against the passenger side mounts and cannot be lifted any higher. I could possibly build a spacer to provide pressure against the tank, and the extra distance would provide access to the bolt despite the depth of the tank.


EXHIBIT C: filler hole distance
View attachment 56168
The strap mount is highlighted in yellow just for reference. The red is the location of the filler hole. There's a significant misalignment. I think I would have to cut off the filler pipe before the bend and run a rubber tank hose in it's place. I'm actually not sure what's supposed to bridge the gap here, since the tank didn't come with any other parts and clearly there's nothing existing on my end to seal the system.


Anyway, just wanted to add these for anyone else that is digging around on the internet and looking for solutions.

EDIT: Oh here's one more shot of the overall spare box for the '76 wagon.

View attachment 56169
Did a little digging for the difference in the floor pans. It looks like the driver side mounting points would have to come down to the level of the passenger side
Link: Love at first sight

You could use a piece of square tube to make up the difference and bolt it through. And then you can make a strap and then bolt it through the floor/square tube


The fuel filler neck is just a piece of pipe.
 

volare 1977

Well-Known Member
Joined
Jun 12, 2014
Messages
1,927
Reaction score
303
Location
maryland
IMO, it would be best to find a donor trunk floor from a late 77 78 up. Remove spot welds and replace the complete trunk floor.
 

AMC Diplomat

Well-Known Member
Joined
Feb 14, 2023
Messages
1,640
Reaction score
773
Location
NY
IMO, it would be best to find a donor trunk floor from a late 77 78 up. Remove spot welds and replace the complete trunk floor.
I agree, that would be best, but depending on where in the country he is, hacking it together is probably more realistic than finding another wagon pan
 

volare 1977

Well-Known Member
Joined
Jun 12, 2014
Messages
1,927
Reaction score
303
Location
maryland
Is the wagon pan different much from a standard 2 or 4 door?? The tanks are the same between the 2 4 and wagon. I got to wonder how different the wagon truck floor is?
 

AMC Diplomat

Well-Known Member
Joined
Feb 14, 2023
Messages
1,640
Reaction score
773
Location
NY
Is the wagon pan different much from a standard 2 or 4 door?? The tanks are the same between the 2 4 and wagon. I got to wonder how different the wagon truck floor is?
Good point, maybe a 5th ave pan would be "good enough"

Edit: maybe @SonOfaTomP and @Heavy Armor can coordinate if they're in the same part of the country. @SonOfaTomP can take the quarters and @Heavy Armor can take the trunk pan all off of 1 car
 
Back
Top